Tomorrow we will be attending the Good Time Quilters Show in Circleville. Last year we got lots of great deals. Of course I will have pictures of everything we buy once we return home!
Wednesday, August 31, 2011
Friday, August 26, 2011
Skirts with pink, skirts with ruffles and skirts with polka dots!
If you noticed around here it has been all about skirts. I'm not sure where this kick came from as it is not an always item that is needed in my wardrobe. Each skirt has about an hours worth of time put into it, and of course each are different. I will be taking better pictures as soon as I can get someone to take them with me wearing the skirts.

This skirt is made with fabric from our new hobby lobby. The fabric is from the Brother's Sisters line. I must admit when I picked this fabric I was not sure if I would even like the skirt when I made it. I was actually thinking about making it into a quilt instead. But anyways, there was a total of 3 yards of fabric used between the skirt fabric and the trim (polka dots). I did have extra of both left as I choose not to make the skirt floor length. This skirt has a small panel that is 14 inches in the front with a ruffle put into it as you can see. The waste band is made with elastic so it can be adjusted as needed.

This skirt is made with a panel type material that I got at Joann Fabrics for $2.00 a yard, I used two panels because I prefer fuller skirts. It was completed with French seams which look great. The fabric was very slippery when sewing it, it has multiple colors of pink in it along with black stripes. The waste band is elastic so it can be adjusted if needed.

This skirt is my favorite out of all them, this was the second fabric I had picked out from Hobby Lobby. The fabric was $4.98 a yard and there were 3 yards purchased. This skirt is not quite as full as the other two as I only used 1 3/4 yard for the actual skirt. If I would do it over again I would use the whole 2 yards just as preference. This skirt also is made using french seams and an elastic waste. The bottom of the skirt has a ruffle added to it, which I could of swore would be the death of me when I was making it. When I looked up purchasing a skirt like this one online they were priced between $65 and $90 a piece. I must say my less than $20 skirt sounds alot better.
I think my next venture will be making a pair of pj pants for my upcoming surgery. I am not a fan of the hospital gowns so as soon as I'm in my room I put on my own clothes. I would love to have a pair of Capri's that are actual Capri's on me. Maybe even add a ruffle to them.
Of course I have quilts that I'm working on, maybe I will be able to push myself away from the clothes making for a while as one is a gift for in two weeks and I havn't even started it yet.
Thursday, August 18, 2011
ATTIC WINDOW QUILT SHOP: AND THE WINNER IS.....!!!!
ATTIC WINDOW QUILT SHOP: AND THE WINNER IS.....!!!!
Check this out! I'm so excitied and can't wait to start thinking and sewing out of the box!
Check this out! I'm so excitied and can't wait to start thinking and sewing out of the box!
Wednesday, August 17, 2011
County Fair Winners
This year we entered 8 quilts into the county fair.
This is the first, designed by myself using the accu cut machine. It received a 1st place.

Look what we found here, a cute little boy and his third place picture of a pig.

This quilt was in the baby or crib quilt division, it was a kit we got at the NQA show. Anyone who knows me knows that if it has cows and pigs on it I have to have it. But needless to say this one brought home a 2nd place.

This quilt was actually made by my grandmother. The quilt is called Tractor Pullin'. In our family there is only one color of tractor. That being said I'm sure you can figure out what kind it is from the red tractors on this quilt. Grandma always tells us her quilts would never win anything but she won 1st place with her quilt!

This quilt was done by my mother for a challenge Thur the local quilt guild. The theme was lights camera action, or something close to that. With her quilt she won 1st place!

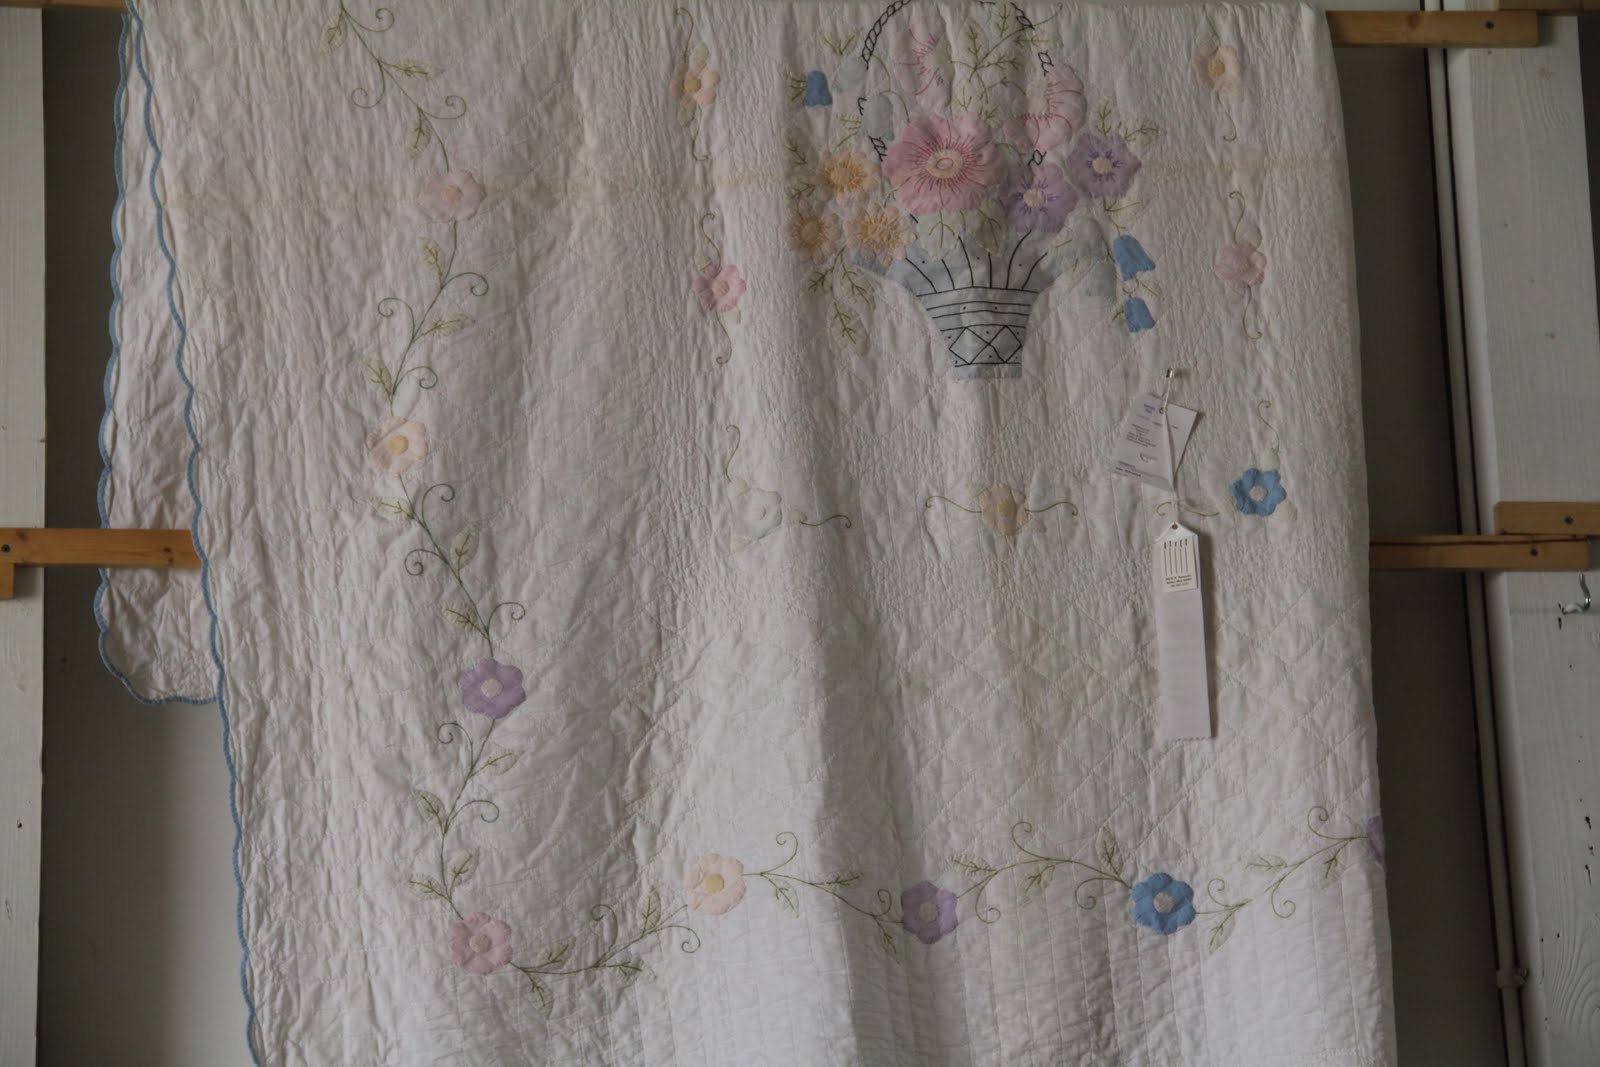
This quilt is hand embroidered and we don't know much history about it. What we do know is we saved it from a man at the flea market that had no clue about quilts. He was going to bleach it to get rid of the stains. This quilt won 3rd place
This quilt is the ending of a stain glass window class. The quilt turned out very nice but it is not one of my favorites. I know living in Buckeye country everyone thinks you have to be a Buckeye fan but not me. So this 1st place quilt is for sale for $100.00

I also entered four pictures, two of them received second place. I forgot to take a picture of them. And I didn't take a picture of the other quilts.
Monday, July 25, 2011
Craft Exchange!
At the end of last month I took part in a craft exchange through craftaholics anonymous blog. This exchange happens twice a year, so mark your calendars to join for the November exchange.


I made a table rug with some of my partners favorite colors. there was not a pattern for this but it can be cut like a rail fence quilt.

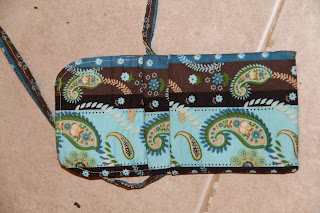
This is a cell phone purse that has two pockets. These are a big hit with everyone around here!
Stay tuned for another update on how my quilts did at the county fair!
Tuesday, June 14, 2011
Graduations


This quilt here is my cusions gradation gift, the 9 patch blocks were made using a shirt from our uncle that passed away a few months ago.

A t-shirt quilt we made for a Danish exchange student, the exchange parents loved it.... lets hope she does too!

This wall hanging is for sale it had been meandered and measurese up around 32 by 48! I'm selling it for $50.

Saturday, May 21, 2011
Hi its me again!
What I have been up to!
This picture is horrible, but it was late and I wanted to share with everyone! If you look closely you will see all the binding isn't even on yet. The best part is this whole quilt which measures 96" long and 60" wide, this fits my day bed perfect. This whole quilt only cost me $55.00 to do, that includes backing, batting and such.

This is a signature quilt that my mother and I did for a 4-H'er in our group. This is her senior year in high school and she will be going away to school. Now all of her friends and loved ones will be able to sign the quilt and she will have them with her when she is away from home!

I have a new pattern that I will be sharing soon that involves applique and sunflowers (of course they are one of my favorite)
Monday, March 7, 2011
a sad note

Last week we lost one of our children, she has been having medical problems for a while but finally got a kidney stone and was unable to use the bathroom. So please say a prayer that she is running around pain free in heaven!
Friday, February 25, 2011
Starry Nights Block of the Month
Hi, hope everyone is doing well! Did you miss me? I know I have missed sewing, but today I went and dug out my dear friend Maggie and got to work on my block of the month from Always In Stitches (will be referred to as LQS). I choose to go with the red white and blue blocks as this is a type I would not normally do!

This picture shows the pattern that you can get from the LQS along with the thangles I used to make my triangle blocks.

I laid out my blue and red strips and laid my thangles on top. I used pins to hold them down so they would not slip. I then sewed on the correct lines. Once I was done sewing them I cut them apart.

I pressed open all my squares and also made the four blue and white squares needed for the block. These are very simple to do with the thangles which they sell at the LQS!

I then took the blocks and laid them out following the pattern that was given! Once they were laid out I sewed each row together then pressed them well. Then I sewed the rows together.
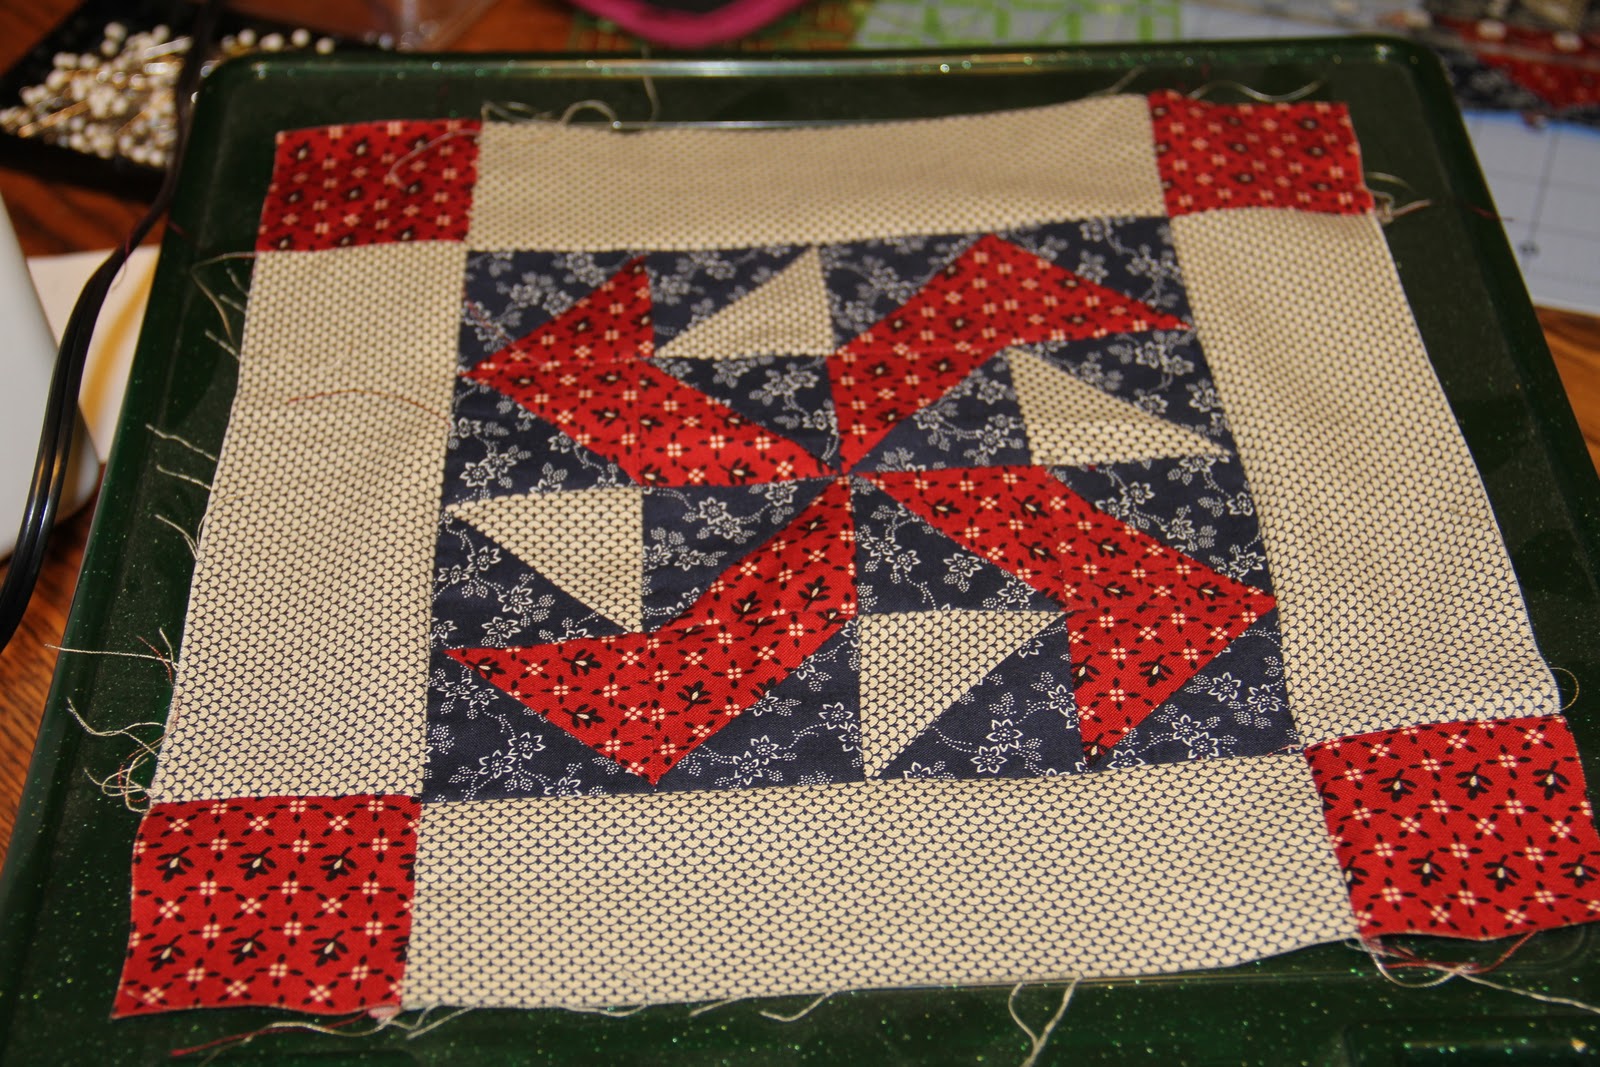
This is the finished block with the borders, which I must say finish it!
Please feel free to contact Always In Stitches at 614 539 7845 if you would like to join in on the fun!
Saturday, February 12, 2011
WOOO HOOO
I got my first comment! Thanks Debbie, I feel very special! and since you were the first ever to comment on my blog I will have to bring you a special treat next time your at the LQS! I know have figured out this is not the Debbie from the lqs and have gotten in contact with the correct Debbie. Note to self don't blog when your tired!
Now if I could get some followers I would be doing great!
Please bear with me, we sold our house and our family is moving in a couple different directions so there is a lot going on around here.
While I'm taking some time to get everything in the right place go over and visit Deb at my life is a stitch !
Please go check out Debbie (1st commenter)'s blog! now that I have this all straight!
Just a funny note, I did not do spell check when I first posted this.... big oops!
Sunday, February 6, 2011
The Farmer's Wife Sampler Quilt
Have you heard of The Farmer's Wife Sampler Quilt?

Some info behind the 1922 Farmer's Wife Contest
The Perception that city dwellers had of farm women in the 1920s was generally not favorable. It was commonly believed that the farm wife was drudged and a slave, miserable with her life, and anxious- if not determined - to see her daughter escape from the farm when she was grown. The Farmer's Wife, a popular women's magazine of the day with 750,000 readers believed that this view was far from the truth.
In January 1922 the editors asked the following question: "If you had a daughter of marriageable age, would you in the light of your own experience want her to marry a farmer?"
There was a prize offered for the best 68 answers submitted, $200 for first, $100 for second, $50 for third and $150 to be divided among the other 65 winners.
This is from page 10 of the book, I know your dying to run out and get it so you can read it. I must say when I first got the book I just wanted to read the letters but now I want to make the quilt. So there is 111 blocks in the whole book.
Here comes the big chance to win some goodies, leave me a message letting me know which way you would think best to do my quilt!
1. A block a week (not sure if this will work)
2. Four Blocks a Month
3. One block a month
I will leave this open until Wednesday so please leave your comments, I'm dying to try it this out! Contact your LQS to get this book it is great!
Wednesday, January 26, 2011
I've been cyber surfing!
Has this wonderful give away! Go check out the site and enter to win, but I must say if you get the loot you have to share the cupcake sign!

Hope you enjoy!
Monday, January 24, 2011
Happy Valentines Day!
You will be so proud, I did better at taking pictures of the project I made. I know it is not even February yet but I'm ready to get out the decorations and start spreading some LOVE!
So I started with these fabrics I pulled out of my fabric cupboard. i was looking for pinks, reds and other types of valentines days colors.


So I started with these fabrics I pulled out of my fabric cupboard. i was looking for pinks, reds and other types of valentines days colors.

Once I picked out my colors I started cutting, I just cut without much paying attention to the widths. I just wanted to make sure I had enough fabric. Once I had them laid out I was able to sew them together with 1/4 inch seams on each strip.

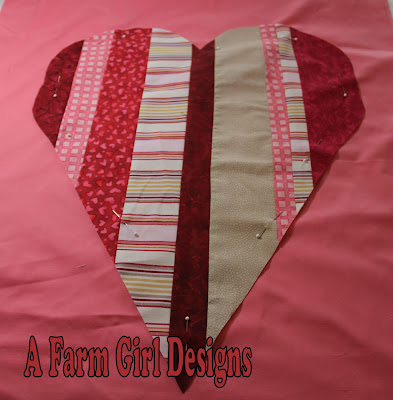
Once I pressed my fabric I made the edges meet and hand drew my heart on the one side of the fabric. I must say it was not perfect but here is my logic, every heart is different so it is what it is!

Once I got my heart cut out I had to pick a color to put it on, I choose a different color of pink that I had laying around. I pinned this down about half an inch from the edge. When I started thinking about this pattern I wanted the edges to be rag type. Don't get me wrong it could have been blanket stitched easily.

I quilted around this heart twice, both in the heart shape. As you can see I left the edges raw so that they would make the rag type I was looking for. I did cut down the background fabric, I will have to measure everything and get a pattern in case someone else would like to make one.

I choose to add the wording LOVE to the center of my quilt, I did this after I had finished the quilt but actually did it as an hand embroidery stitching. Which I must say was very tricky not to get the backing fabric while doing this. I'm thinking about looking for some Valentines buttons to add to it but we will see.

This is the finished product, I used extra fabric left over to make my binding for the quilt. Please pay no attention to the small string under the e. Pay more attention to the raw edges that I love on this quilt!

Please stay tuned as I will upload a PDF file on how you can make one of these of your own.
Saturday, January 22, 2011
A New Project Started.....
Today my Mom and I went to Pleasant Mountain Stitchery and enjoyed our first class on the Baltimore Christmas block of the month.


Of course this is the whole quilt, our first block is the Angel Wreath (left side, second one down). I have done applique before but I must say not at this level. I think so far I have cut out at least thirty pieces to this first block. I'm sure it will end up being great when I get it done but I sure do have a lot of work cut out for me. To check out more on this pattern please go to Baltimore Christmas site.
While I was down at PMS I found this awesome pattern called Jack and Jill by Izzy and Ivy Designs. Izzy and Ivy Designs


They do have a sample of this hat at the store but I have seen it on other blogs and fell in love with it long before seeing it in person. I got so excited when I found this pattern and of course gave mom that face so I now have the fabric to make one. Hopefully tomorrow I will be able to start this and finish it tomorrow. So stay tuned to see how things go!
While you are out and about in blog land stop by lila tueller designs for a great give away Below is a picture of what she is giving away.

_________________________________________________________________________________
Another give away is going on over at Polka Dot Chair Blog she is giving away a few things including fabric and a book! So what are you waiting on hop right on over there and join in the give away!
Saturday, January 15, 2011
Ladies Lead In
Have you ever been to a fair and seen very nice outfits made out of wool with ladies or gents wearing them? Of course they have lamb with them. This is what ties the whole thing together. A long time ago I use to do this even dressed up the lamb too! So JoAnn's had patterns on sale so I scooted out there and picked up two one for a jacket and another for a dress.

This is the dress I picked, I think it is adorable and would look good with my body style. I would like to do the print in the color of black wool and the trim in either the green, pink or printed wool below. Pattern 5640 McCalls

The pattern I picked has two choices of jackets, I can not decide which one I like the best. I'm leaning towards the one with the smaller collar. If I choose to use this pattern I will do the large part in black and the other to correspond with the dress. Pattern 5424 Butterick

I'm in love with this green wool! In the race for the outfit I think it will be this one but we will see.

This Burgundy is also beautiful, although I'm not sure it is what I'm wanting.

This one I'm just not sure.......
The biggest thing is finding a sheep to use for the lead in!!!!
Please tell me what you think? other options? They prefer that most of the outfit be made of wool.
Wednesday, January 12, 2011
So I'm really bad at .....
taking pictures as I make something. We had to change all the locks in our house due to a breaking in issue. So we had to get new keys... if you look close there is one with Mickey himself on it. But anyways back to what I did make, a new laynard for my keys.
I often find myself looking for my keys when it is time to go somewhere. Yes I have a basket that they go in but sometimes they don't always stay there. You would think I live with little kids that pick things up but no it is just my husband.

I often find myself looking for my keys when it is time to go somewhere. Yes I have a basket that they go in but sometimes they don't always stay there. You would think I live with little kids that pick things up but no it is just my husband.

Some directions on how to make this easy inexpensive laynard.
Supplies:
1 Key Ring
1 Piece of fabric 31/2 inches by wof
2 strips of fusible interfacing 3 inches by wof
Iron your fusible to the wrong side of fabric, fold each end of the fabric in and press to make sure not to leave any raw edges showing. Once pressing is complete place right sides of the fabric together and sew a scant 1/4th inch seam down the side. Then comes the fun part turning it right side out.
During this time my husband asked me at least fifty times what I was doing and why I was doing it.
Once the fabric is turned right side out press wrinkles out and sew along all edges of the fabric allowing a finished look.
To place fabric on the key ring fold both edges together and place them through the key ring. Then sew to keep in place. I sewed over mine three times to make sure it won't fly off. I tend to stand around and twirl my keys and it could happen.
Hope you enjoy.
Next time I will take better pictures!
Sunday, January 9, 2011
Winter Wonderland!
So during this winter wonderland I have been busy! Today I was able to finish my 4-H bag! I can't wait to make another one, it went together easily.


 Lets just say Haylie was not happy about the photo shoot! I woke her up off the couch to test out the new bed! I found a premade blanket at Joanns the day after Thanksgiving, then I sewed around it and stuffed it so I will be able to throw it in the wash for any just in case problems. I just got a report Izzy has curled up into a ball on it!
While you are out in blog land check out Jerusalem Notes they are having a great give away that ends January 16th!

I put my name on it so no one can steal it from me!
The bottom fabric has three different colors of 4 leaf clovers then a strip of black and green with black polka dots!

Don't look to close I didn't like the large circle so I cut it down and almost cut off part of the writing.... good thing it is mine!
Then I did some hand stitching on a snowman for the front door, I might get it done by next year!
After dinner I got a burst of energy and got one dog pillow done!

While you are out in blog land check out Jerusalem Notes they are having a great give away that ends January 16th!
Friday, January 7, 2011
What have you been up to?


This is Lucy, she was a drop off when I lived with my parents. Long story short she was so cute as was Dad so I got to keep her!

This is Kylie she started out as a puppy with my brother, then she went to live with my sister. When we moved into our house my sister came to live with us so now she is part of the clan.
I know this is crazy but I even have two more dogs that are not in this post.
So anyways back to the point, what have you been doing? Digging out from a large amount of snow? Maybe staying in and sewing? That is what I have been doing. I found a pattern made by Whistlepig Creek Craft Patterns, it is called BYOB II. One pattern has six different size bags in it.

I'm doing the large bag with three different colors, the bottom will have four leaf clovers, then a black strip and a green polka dot. Instead of putting just an initial on it I used the embroidery machine and put Country Town 4-H on one side and my name on the other. This way all my 4-H stuff stays in one bag!
Since it is snowing/sleeting/other nasty cold winter stuff I am hoping to finish it today. As soon as it is done I show you a picture of my finished product.
Subscribe to:
Posts (Atom)